April 09, 2015
How to Polish a Flute: What All Beginners Need to Know
How to Polish a Flute
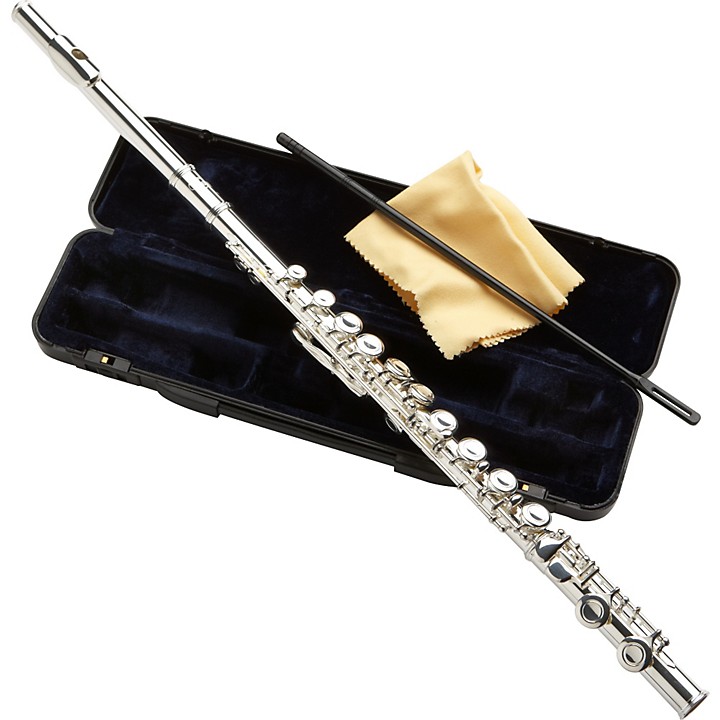
To polish a flute, begin by disassembling the instrument and then clean each piece with a special polishing cloth. Polishing your flute will keep your instrument looking bright and shiny. It will also prevent the metal from becoming tarnished or eroded, thus preserving the life of the flute as long as possible.
Although flutes are technically woodwind instruments, modern flutes are made of metal. Most instrument makers use nickel, silver or silver-plated brass. Regardless of the material, you’ll need to polish your flute regularly. Learning how to polish a flute is one of the first things you’ll learn when you take flute lessons.
When you’re a beginning flute player, it’s important to develop a regular routine for cleaning and maintaining your instrument. Get in the habit of polishing your flute before and after each practice session. Although this might sound time consuming, once you learn how to polish a flute, it will only take you a few minutes.
To polish a flute, you will need to follow a few easy steps:
- Choose the right polishing cloth
- Disassemble the flute
- Polish the exterior
- Polish the interior
- Clean the tenons
Step 1. Choose the Right Polishing Cloth
Before you begin learning how to polish a flute, first you’ll need to acquire the right accessories. Specifically, you’ll need a polishing cloth. Many flutes come with a polishing cloth when first purchased. However, if yours doesn’t, you can find a high quality polishing cloth at any music store, or online.
The best polishing cloth will be made of a soft microfiber material that traps dirt and removes smudges and fingerprints. Make sure to choose a polishing cloth that can be washed and used repeatedly.
When you’re polishing a flute, don’t use silver polish or other liquids. Although it can be tempting to give your instrument an extra shine, liquid polish isn’t recommended because it can damage the instrument’s finger pads and cause the metal to rust.
Step 2. Disassemble the Flute
After you’ve acquired a polishing cloth, you’re ready to begin. Start by disassembling the flute. Gently unscrew the flute and separate the head joint and the foot joint from the body of the instrument.
Lay each piece down carefully in your case or on a flat, dry surface. Use caution when touching the keys and keypads. On a flute, the keys and keypads are very delicate and can be easily damaged.
Step 3. Polish the Exterior
Next, use your polishing cloth to polish the exterior of the flute. Use gentle, fluid movements and rub the cloth over the length of each piece while avoiding the keys and keypads. Work until all dirt, smudges and fingerprints have been removed. You may find it easier to rub the cloth in one direction to create a consistent shine.
Step 4. Polish the Interior
Once the exterior has been polished, the next step in learning how to polish a flute is to polish the interior. Although this won’t affect the instrument’s appearance, polishing the interior of the flute keeps it dry and prevents moisture from damaging the metal.
Wrap your polishing cloth around a cleaning rod, then use the rod to maneuver the cloth through the body of the flute. This will collect any lingering moisture.
Step 5. Clean the Tenons
Finally, polish the tenons. Tenons are the ends of each piece of the flute, where the head joint and the foot joint screw onto the body. Because the tenons cause a hairline gap in the instrument, it’s easy for grease, dirt and oil from your hands to collect there.
With your polishing cloth, carefully clean the grooves of each tenon. Then, place the instrument in its case. Your flute is now polished and ready to go for your next playing session.
Learn How to Polish a Flute and More with Private Flute Lesson
To learn more about polishing, cleaning and maintaining your flute, sign up for private music lessons from Music and Arts. Our professional flute instructors will show you everything you need to care for your instrument and show you new techniques to improve your playing. To learn more, contact your local Music and Arts store today or send us an email.
![]()